

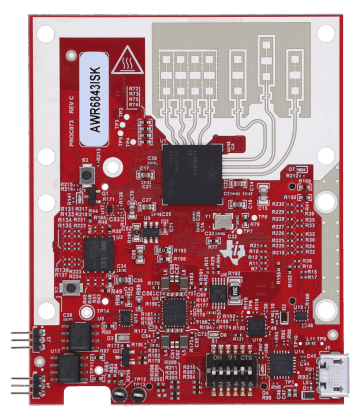
RemoteRF supports the Texas Instruments AWR6843 / IWR6843, a single-chip 60 to 64 GHz frequency-modulated continuous-wave (FMCW) millimeter-wave radar sensor. Equipped with a 3 TX / 4 RX antenna array, an integrated C674x DSP, and up to 4 GHz of sweep bandwidth, it provides centimeter-level range resolution alongside real-time 3D angle-of-arrival and radial Doppler velocity estimation. This guide covers how to initialize, configure, and stream radar frames with a reserved TI mmWave radar through RemoteRF using Python.
Device Initialization
To interface with a TI mmWave radar through RemoteRF, call ensure_driver to make sure the local driver is up to date, import TiMmWave from remoterf.drivers.ti_awr6843, and initialize a radar object with either your reserved device handle (e.g., "TI_Radar@ucla" while logged in with remoterf --login) or the reservation token issued by resdev:
from remoterf.drivers import ensure_driver
ensure_driver(token="TI_Radar@ucla")

from remoterf.drivers.ti_awr6843 import TiMmWave
radar = TiMmWave(token="TI_Radar@ucla") # device handle or reservation token
Once initialized, the radar object provides direct access to 3D point clouds, 2D range-azimuth heatmaps, and runtime chirp configuration properties without requiring manual packet parsing on the client.
Example Script
The Python script below demonstrates how to configure a TI mmWave radar and capture 3D point-cloud frames with it via the RemoteRF platform.
In this example, the script queries the radar’s firmware version, configures the indoor 3D sensing profile, captures parsed 3D point clouds (x, y, z, Doppler velocity, and snr_db) with radar.capture_point_cloud(), and plots top-down and 3D views of the detected points.
Note that the device initialization lines described above have already been included in the code below. You should not need to change any of the code below except for the device handle or token for your reservation.
import time
import numpy as np
import matplotlib.pyplot as plt
from remoterf.drivers import ensure_driver

# -------------------------------------------------------
# 1. Connect to Reserved TI AWR6843 Radar
# -------------------------------------------------------
TOKEN = "TI_Radar@ucla"
ensure_driver(token=TOKEN)

from remoterf.drivers.ti_awr6843 import TiMmWave

radar = TiMmWave(token=TOKEN)

print("Device info:", radar.device_info)
print("Version:", radar.query_version())

# -------------------------------------------------------
# 2. Start Sensor and Capture 3D Point-Cloud Frames
# -------------------------------------------------------
radar.flush_frames()
radar.start()
time.sleep(0.2)

xs, ys, zs, vels, snrs = [], [], [], [], []
num_frames = 20

for i in range(num_frames):
    cloud = radar.capture_point_cloud(timeout=1.0)
    if cloud["num_points"] > 0:
        xs.extend(np.asarray(cloud["x"]).tolist())
        ys.extend(np.asarray(cloud["y"]).tolist())
        zs.extend(np.asarray(cloud["z"]).tolist())
        vels.extend(np.asarray(cloud["velocity"]).tolist())
        snrs.extend(np.asarray(cloud["snr_db"]).tolist())
    print(
        f"Frame {cloud['frame_number']:4d}: "
        f"{cloud['num_points']:2d} points"
    )

radar.stop()
radar.close()

xs = np.asarray(xs, dtype=np.float32)
ys = np.asarray(ys, dtype=np.float32)
zs = np.asarray(zs, dtype=np.float32)
snrs = np.asarray(snrs, dtype=np.float32)

# -------------------------------------------------------
# 3. Plot Top-Down (X-Y) and 3D (X-Y-Z) Point Cloud
# -------------------------------------------------------
fig = plt.figure(figsize=(12, 5))

ax1 = fig.add_subplot(1, 2, 1)
if xs.size > 0:
    sc = ax1.scatter(xs, ys, c=snrs, cmap="viridis", s=28, alpha=0.85)
    plt.colorbar(sc, ax=ax1, label="SNR (dB)")
ax1.plot(0, 0, "r^", markersize=10, label="Radar Origin")
ax1.set_title("Top-Down Radar Point Cloud (X-Y)")
ax1.set_xlabel("Cross-Range X (m)")
ax1.set_ylabel("Range Y (m)")
ax1.set_xlim(-4.0, 4.0)
ax1.set_ylim(0.0, 6.0)
ax1.grid(True, alpha=0.3)
ax1.legend(loc="upper right")

ax2 = fig.add_subplot(1, 2, 2, projection="3d")
if xs.size > 0:
    ax2.scatter(xs, ys, zs, c=snrs, cmap="viridis", s=24, alpha=0.85)
ax2.set_title("3D mmWave Point Cloud")
ax2.set_xlabel("X (m)")
ax2.set_ylabel("Y (m)")
ax2.set_zlabel("Z (m)")
ax2.set_xlim(-4.0, 4.0)
ax2.set_ylim(0.0, 6.0)
ax2.set_zlim(-2.0, 2.0)

plt.tight_layout()
plt.savefig("ti_mmwave_point_cloud.png", dpi=150)
plt.show()
Properties and Methods
Properties
The properties below inspect and configure the TiMmWave sensor state.
| Property | Type | Access | Description & Range |
|---|---|---|---|
device_info |
dict |
R/O | Hardware and transport metadata including CLI/data UART ports, baud rates (115200 / 921600), and firmware profile name. |
firmware_profile |
str |
R/O | Active TI mmWave SDK firmware profile identifier (e.g., 'xwr68xx_oob_sdk3'). |
is_running |
bool |
R/O | True when the radar RF front-end is actively chirping and streaming TLV frames. |
stream_stats |
dict |
R/O | Frame buffer statistics including total frames captured, dropped frames, bytes read, current EMA FPS, and buffer queue depth. |
config |
dict |
R/O | Active configuration parameters dictionary (preset, mode, clutter_removal, fps, config_file). |
preset |
str |
R/W | High-level chirp profile preset: 'default', 'indoor-people', 'gesture', 'fast-motion', or 'heatmap'. |
mode |
str |
R/W | Antenna elevation mode: '3d' (3 TX / 4 RX with elevation) or '2d' (2 TX / 4 RX azimuth-only). |
fps |
float |
R/W | Radar frame rate in Hz (1.0 to 30.0 Hz, default 10.0 Hz). |
clutter_removal |
bool |
R/W | Enables or disables onboard static clutter removal (zero-Doppler subtraction). |
sensitivity |
str |
R/W | CFAR detection threshold preset: 'low' (20 dB), 'medium' (15 dB), or 'high' (10 dB). |
min_range / max_range |
float |
R/W | Field-of-view range gate limits in meters (cfarFovCfg). |
Methods
The methods below capture 3D point clouds, 2D range-azimuth heatmaps, and control radar configuration and streaming.
| Method | Returns | Description |
|---|---|---|
capture_point_cloud(timeout=1.0) |
dict |
Captures the next frame and returns parsed 1D float32 NumPy arrays: {'frame_number', 'timestamp', 'num_points', 'x', 'y', 'z', 'velocity', 'range', 'azimuth_deg', 'elevation_deg', 'snr_db'}. |
capture_points(timeout=1.0) |
np.ndarray (float32) |
Captures the next frame and returns an (N, 4) NumPy array with columns [x, y, z, velocity]. |
capture_heatmap(num_angle_bins=64, max_range=6.0, timeout=1.0) |
dict |
Captures the azimuth static heatmap (TLV Type 4) and performs 2D Angle-FFT beamforming, returning {'frame_number', 'timestamp', 'range_grid', 'azimuth_grid_deg', 'heatmap_db'}. |
configure(preset='default', mode='3d', clutter_removal=False, fps=10.0, start=True) |
bool |
Reconfigures the radar with high-level preset parameters and optionally restarts RF streaming. |
apply_config(config_text, start=True, command_timeout=5.0) |
bool |
Sends a multi-line TI mmWave SDK .cfg profile to the CLI UART and optionally starts the sensor. |
start(timeout=5.0) |
bool |
Issues sensorStart to begin RF chirping and frame streaming. |
stop(timeout=5.0) |
bool |
Issues sensorStop to halt RF transmission and frame streaming. |
flush_frames() |
int |
Clears any queued serial bytes in the parser buffer and returns the number of discarded bytes. |
reset() |
bool |
Flushes the frame parser and resets the driver buffer state. |
send_command(command, timeout=2.0) |
str |
Sends a single CLI command (e.g., 'cfarCfg -1 0 2 8 4 3 0 15 1') and returns the textual CLI response. |
query_version(timeout=2.0) |
str |
Issues the version CLI command and returns the radar firmware version response string. |
read_frame(timeout=1.0) |
bytes |
Returns one raw binary TLV UART packet (starting with magic word 02 01 04 03 06 05 08 07) for custom low-level inspection. |
close() |
None |
Closes the client RPC session. |
Tips and Tricks
1. Understanding the TI Coordinate Frame
In the standard TI mmWave SDK out-of-box demo coordinate system:
- X (m): Horizontal cross-range (left is negative, right is positive).
- Y (m): Forward boresight range in front of the antenna face (Y ≥ 0).
- Z (m): Vertical elevation (down is negative, up is positive).
- Radial velocity (m/s): Negative values indicate targets moving toward the radar; positive values indicate targets moving away.
2. Customizing the Chirp Profile
You can upload any valid TI mmWave Visualizer .cfg script directly from Python using radar.apply_config(cfg_string, start=True). For example, to enable static clutter removal so stationary walls and furniture are suppressed in indoor rooms, include clutterRemoval -1 1 in your profile before sensorStart.
3. Flushing Stale Frames
If your Python loop pauses for plotting or heavy processing, call radar.flush_frames() before radar.read_frame() so your next call reads the freshest radar sweep rather than older buffered packets.